oNote UI Tour
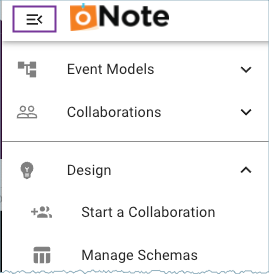
Navigation bar menus
The navigation bar provides fast access to oNote features. When a model is open on your canvas, more options become available.
Expand the main navigation panel to view feature options. Hover your mouse on the left navigation bar to view the menu options. Collapse the menu to maximize screen real estate when you’re working with a model. When you aren’t hovering on the navigation bar, the menu automatically collapses unless you’ve explicitly set it open. To hold the expanded menu open, click the hamburger menu icon in the upper left. To collapse the main menu again, click the collapse icon.
When you expand menus, the oNote app remembers their state as you go back and forth when accessing the menu options.
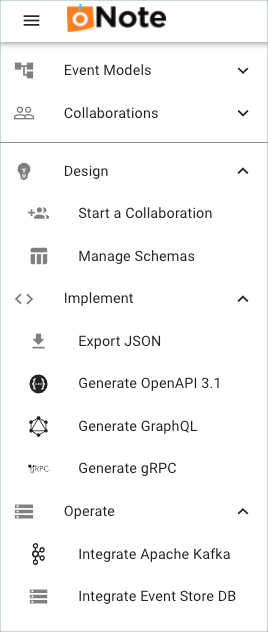
Menu quick reference
The uppermost menu sections contain your event models.
The rest of the menus reinforce features that help you Design, Implement, and Operate the results of your event-driven models.
| Menu Section | Description |
|---|---|
Design |
Manage your schemas. |
Implement |
Export your models in a JSON format, and generate code for OAS, GraphQL, and gRPC. |
Operate |
Integrate artifacts from your models with Apache Kafka and Event Store DB. |
For more information about available features, see the full Menu reference.
Event model canvas
When you first add a new event model, the canvas is a blank slate ready for your input. The infinite canvas provides plenty of room to continue placing model objects in a rightward direction as you move forward along the timeline. You can insert lanes and insert columns as needed to expand your canvas, which conveniently accommodates your evolving event model designs.
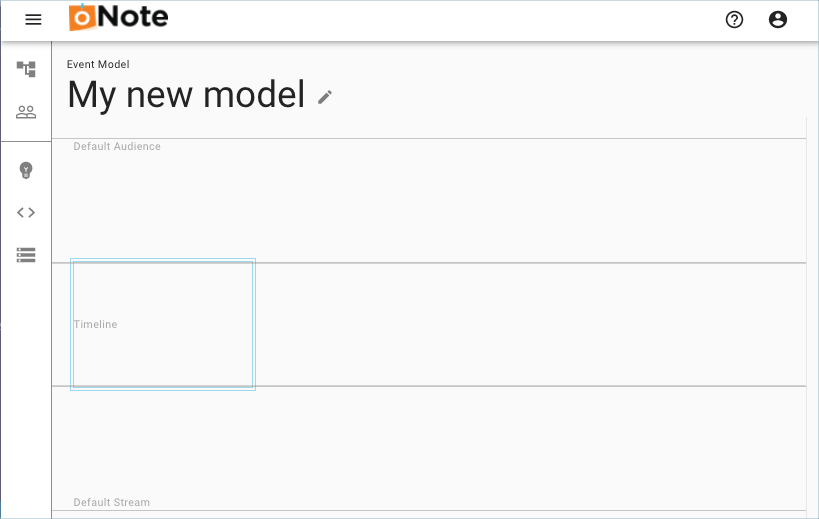
Default lanes
The canvas has three default lanes that cannot be deleted, relocated, or renamed:
-
Default Audience
-
Timeline
-
Default Stream
You can insert lanes within your event model, edit the lane name, and delete those custom lanes.
Allowed model objects by lane type
The event model objects that you can add within a lane depend on the particular lane type.
| Lane type | Allowed model objects |
|---|---|
Default Audience |
Interfaces |
Timeline |
Commands, Read Models |
Default Stream |
Events |
Allowed locations to insert a lane
The ability to insert a lane above or below an existing lane depends upon the context of the current lane type, as determined by the cursor position.
| Lane type | Description |
|---|---|
Default Audience |
Default lane located at the top of the model. Can only insert a custom audience lane below. |
Timeline |
Default lane. Can insert an audience lane above or a stream lane below. There can be only one Timeline lane in an event model. The Timeline lane is the central lane in the model canvas. |
Custom lane |
Any lane that is not a default lane. Can insert a lane above or below depending on context. |
Default Stream |
Default lane located at the bottom of the model. Can only insert another custom stream lane above. |
Navigate a model
Navigate your cursor using the directional arrow keys on your keyboard or the available keyboard shortcuts. The cursor focus appears as a box with a blue outline.
As you populate your model, color-coded interface objects appear.
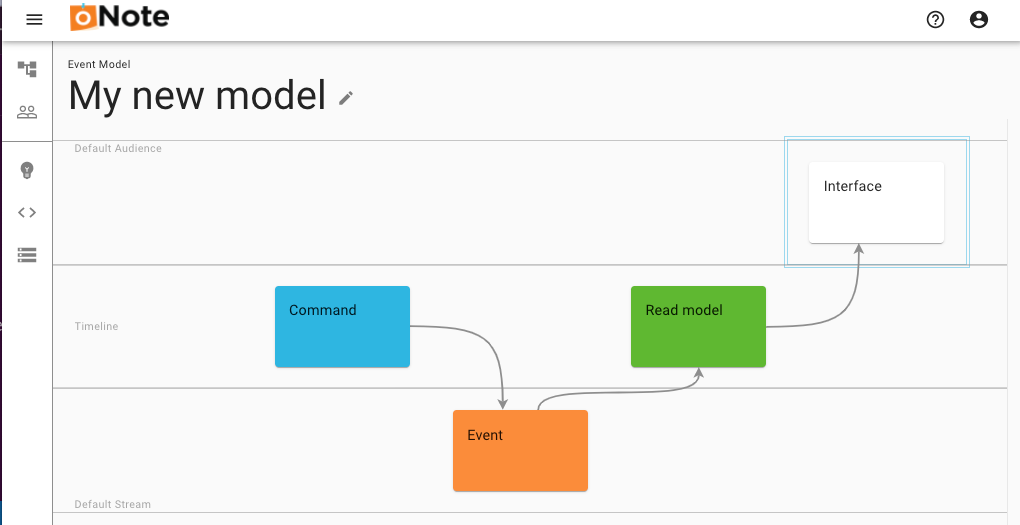
| Model object | Color |
|---|---|
Interface |
White |
Commands |
Blue |
Read Models |
Green |
Events |
Orange |
Populate a model
You can populate your model using the smart cursor mode, manual cursor mode, right-click menus, or a combination thereof.
Brainstorm mode
Quickly populate model objects on your canvas by hitting tab instead of enter.
-
Place your cursor in a lane and hit enter.
-
Give the object a Name and hit tab.
The cursor moves to the next grid square, ready for you to enter a name for the next object.
-
Enter a Name and hit tab. Repeat until you’re done creating objects for that lane. You can edit the names or relocate the placements afterward.
| The Timeline lane requires you to indicate which object you’re creating: command or read model. When using the smart cursor mode, subsequent landings on the timeline do not require disambiguation because the smart cursor is aware of the context in a contiguous sinusoidal flow. |
Keyboard shortcuts
You can quickly navigate your event model using keyboard shortcuts. The keybindings also support actions such as importing models, and adding or deleting lanes.
Press Shift+? to get available options at any location in the model canvas.
Smart cursor mode
If you are new to event modeling, or want to quickly create the basic foundation of a model, you can use the smart cursor mode. Smart cursor is a predictive auto-completion feature. As you create your model, you can proceed to the next logical object by pressing Ctrl+Enter when ending each entry. The smart cursor also automatically links the appropriate objects as you move forward on the timeline.
| The smart cursor mode only traverses to the default stream and default audience (interfaces), skipping any custom lanes you’ve inserted. If you’ve inserted custom lanes, you can click and drag the model object to the custom lane location that you want after completing a model pattern with the smart cursor mode. The links between objects are retained as you drag them on the canvas. |
Manual cursor mode
If you press just Enter instead of Ctrl+Enter after creating an object, then you are in a manual cursor mode. When you create your next model object sequence, click Ctrl+Enter to switch back to smart cursor mode.
| You can switch back to smart cursor mode if you are starting another sequence pattern that is disconnected (not contiguous) from a prior interface > command > event > read model sequence. |
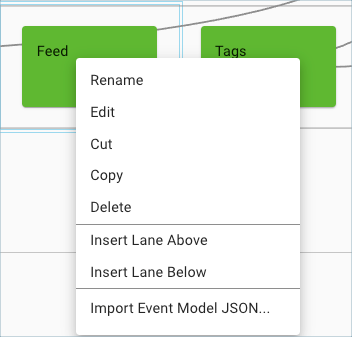
Right-click context menu mode
If you prefer, you can also right-click in a lane or on a model object to open a context menu. The options that appear depend on the object, location, and any prior actions. For instance, if you cut or copied an item, the paste option becomes available.
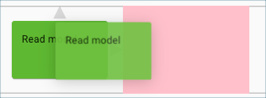
Move a model object on the canvas grid
A model object is analogous to a sticky note. You can adjust the placement of a model object by clicking and dragging it to another location on the grid. A valid placement displays a grid cell with a pink background.
If you try to drag an object to an invalid position, it snaps back to its original position. The oNote app does not allow invalid placement of a model object.
Cut or copy and paste a model object
Cut or copy and paste a model object on the canvas. Only valid paste locations are allowed. You can use the right-click context menu or keyboard shortcuts.
Copy:
-
Press Ctrl+C
Cut:
-
Press Ctrl+K
Paste:
-
Press Ctrl+P
For more information on other supported key bindings for these commands, see keyboard shortcuts.
Linking mode
You can create links in any of the following ways:
-
smart cursor (automatic links)
-
linking mode using keyboard shortcuts
-
click and drag using your mouse
If you are using the Smart cursor mode, links are automatically created between model objects for you.
Otherwise, you can manually link objects by entering linking mode:
-
Press Shift+F
Or
-
Press Shift+L
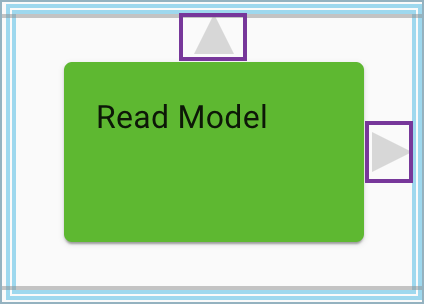
A yellow arrow on the left side of an object indicates you are in linking mode.
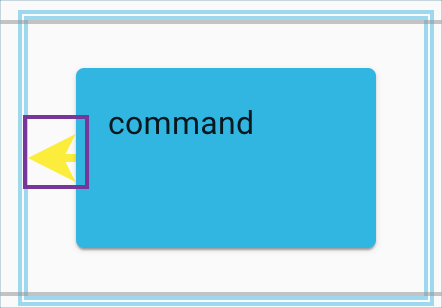
You can then use the keyboard keys or shortcuts to move the cursor focus. You can also just manually click and drag an arrow to an allowed target.
When an object has focus, valid anchor locations for links appear.
Link legend
A color legend indicates valid or invalid links between model objects:
- Green
-
The connecting arrow is on a valid object to connect to. Press Enter to create the edge (connection). The dotted line becomes a solid line.
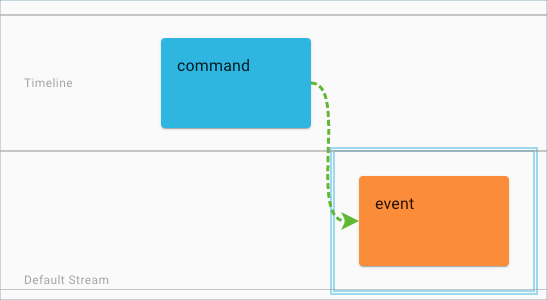 Valid object link
 - Yellow
-
A yellow arrow indicates when the cursor isn’t on a valid destination object yet.
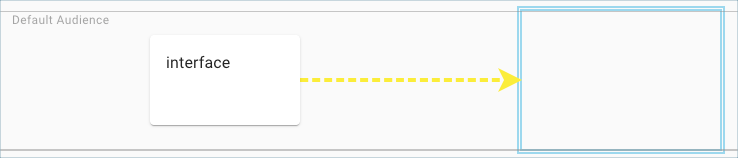 Off target link
 - Red
-
A red arrow indicates an invalid destination. A link cannot be made. Flow arrows can only go forward on the timeline, not backward.
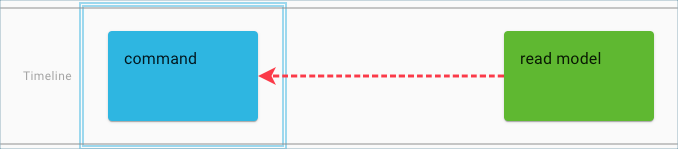 Invalid link
Interface Editor
The Interface Editor is a separate side canvas from the main modeling canvas. After adding and naming an interface in the Default Audience lane or a custom Audience lane of the main modeling canvas, press Shift+Enter, or right-click and choose Edit from the context menu. You can rename an interface or add a description in the Details tab. You can choose the Interface type and configure the interface in the Interface Designer tab.
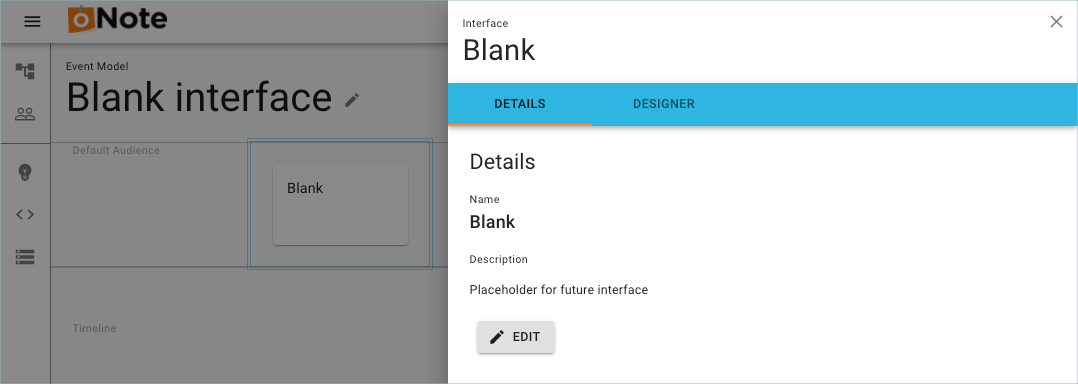
For more information, see Interfaces.